Keep in mind this is a very brief, straightforward, and short tutorial. It takes a while to just be able to start a map without googling how to be honest. I am no master map maker either, I've only made one and then privated it because I forgot to pack in my custom materials into the map, so while I saw everything fine to anyone else it was full of missing textures. But, I have watched lots of tutorials and if I was able to stay focused, I think I'd make a pretty cool map. So here goes, if you for some reason want to make a GMod map, here's how to start out.
One last thing though. I use Hammer++, an addon to Hammer that makes it slightly more modern and fixes a lot of the inconveniences that it brings. Hammer++ Site
Another extremely useful website is the official Valve level design site. It's filled with loads of documentation and articles about level designing in Hammer. Valve Site
Ok, now we can finally get started.
Open up Steam and browse Garry's Mod local files (right click on the game, hover over manage, browse local files), and open the bin folder (C:\SteamLibrary\steamapps\common\GarrysMod\bin). Scroll down until you see Hammer.exe and open it.
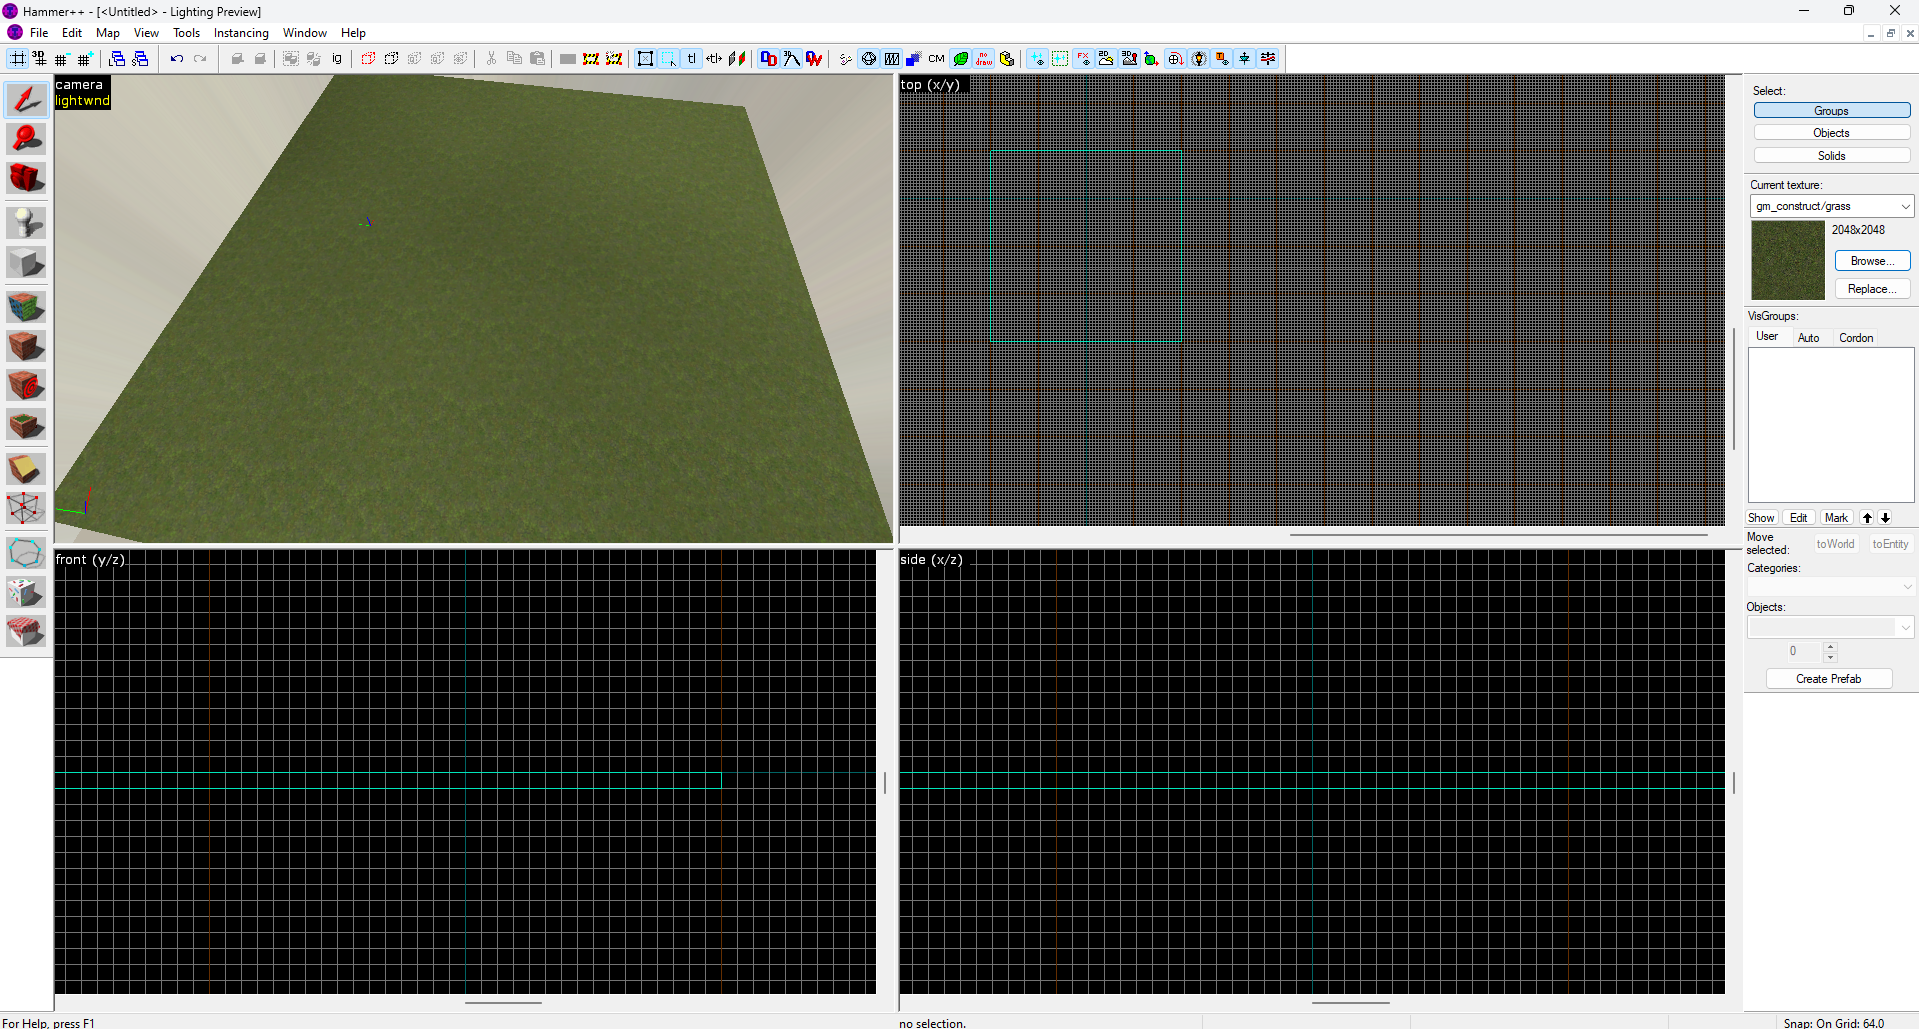
When you open Hammer you'll notice 4 views, and tools on all sides. First, click on File on the top left and then new. Next, choose the block tool to create a block to stand on from the left side of the screen. Then, opening the texture browser on the right, choose any texture you want. I chose the grass from gm_Construct.
Click and drag your cursor over any of the three grid views (I recommend the top right 'Top' view.) and create a block in whatever size you want. Then press enter.
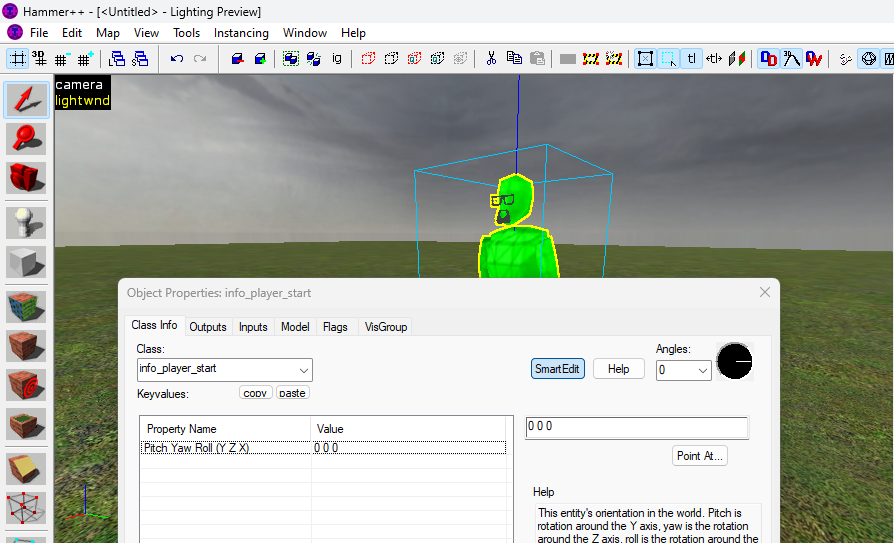
Then click on the Entity Tool right above the block tool. Click anywhere on your platform and you'll see a green Gordon Freeman. This is your spawnpoint and the default entity. To make this entity something else like a prop or light source, double click on it. You can then change its class to something like "prop_static", or "light_spot". But for now, let's just keep the original spawnpoint entity.
Lastly, the last thing you need to make this an actual, working map is to create a skybox. Go back to the texture browser and type in the filter "toolsskybox". Choose the light blue texture that says 'skybox' in the middle and create a block on each side of your platform, as well as one last block on top of it all. Keep the whole thing sealed, as if you are creating an air tight box with no holes for anything to come inside.
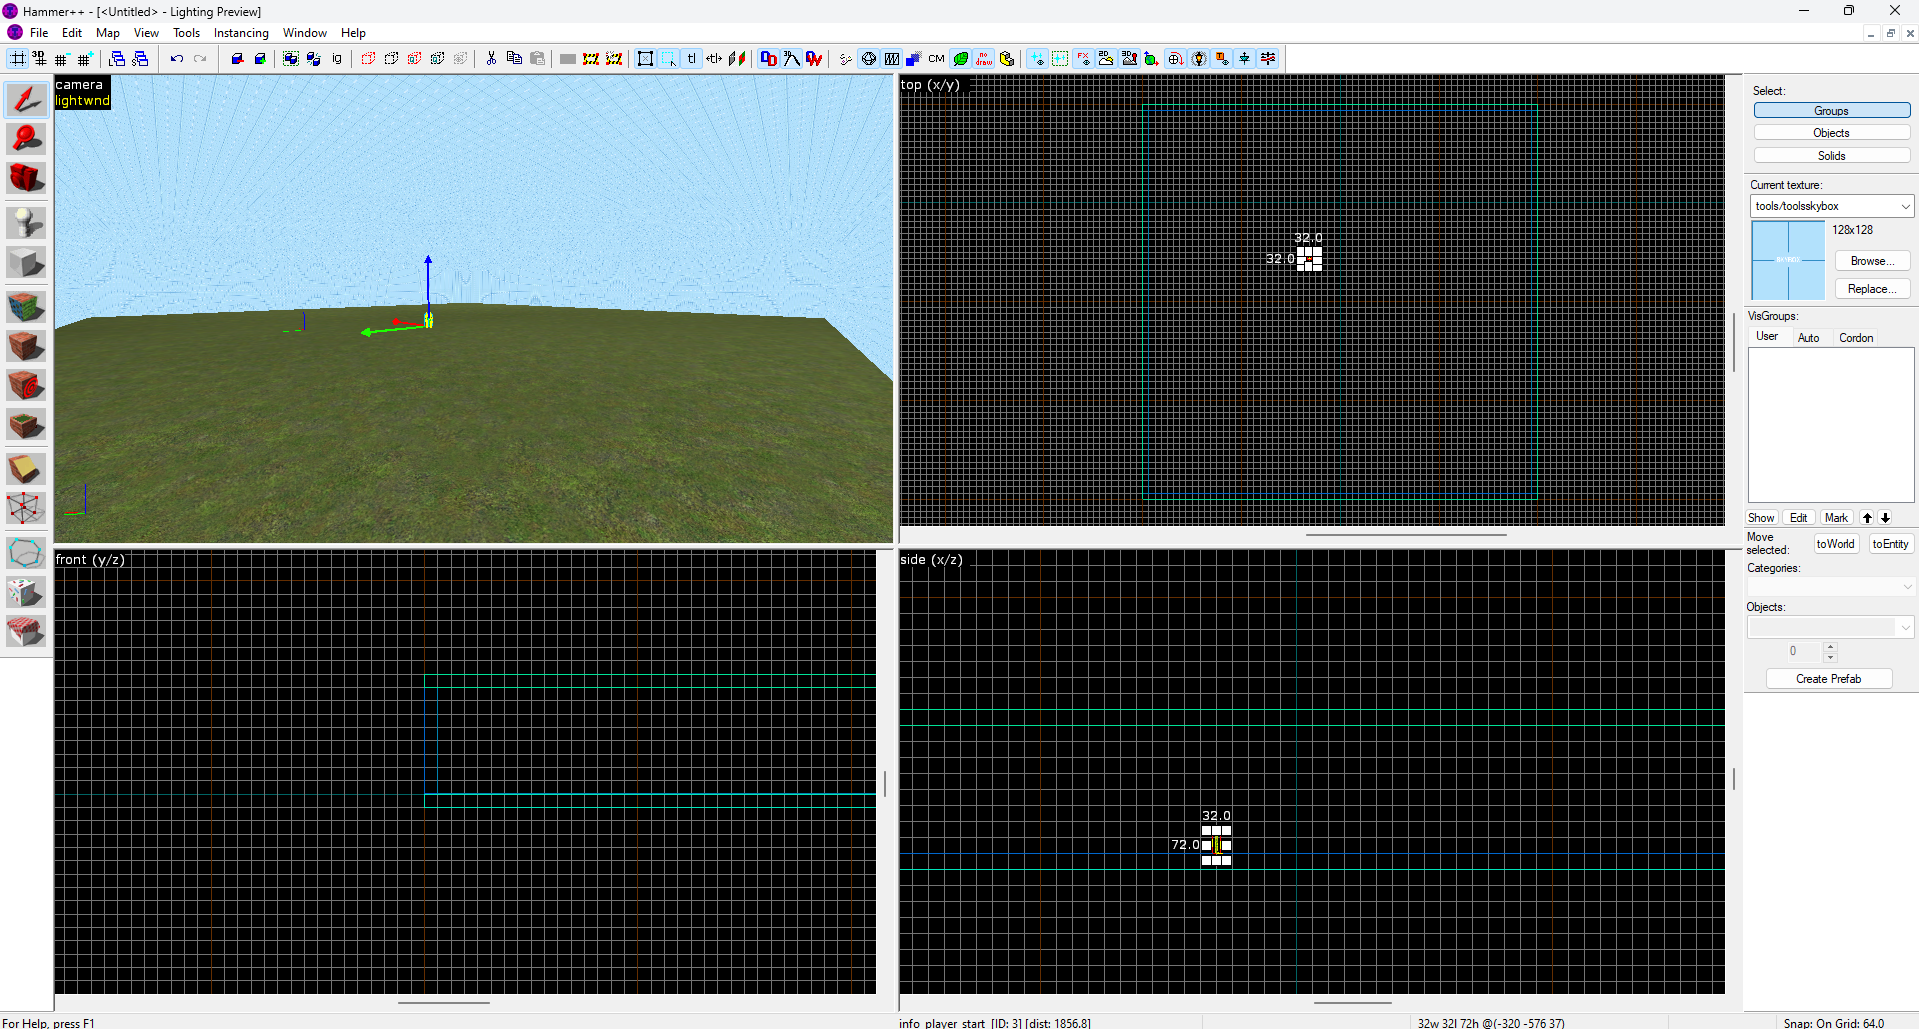
This is what it should look like. Make sure that no black is visible from the inside of this 'box', that it is completely contained by the skybox.
Then, click on 'Map' on the top left, click 'Map Properties', and go down to the SkyBox Texture Name. By default it should be 'sky_day01 01', but you can change the texture by going to HL2 Sky List, going through the list and entering the name of whatever skybox you like over 'sky_day01 01'.
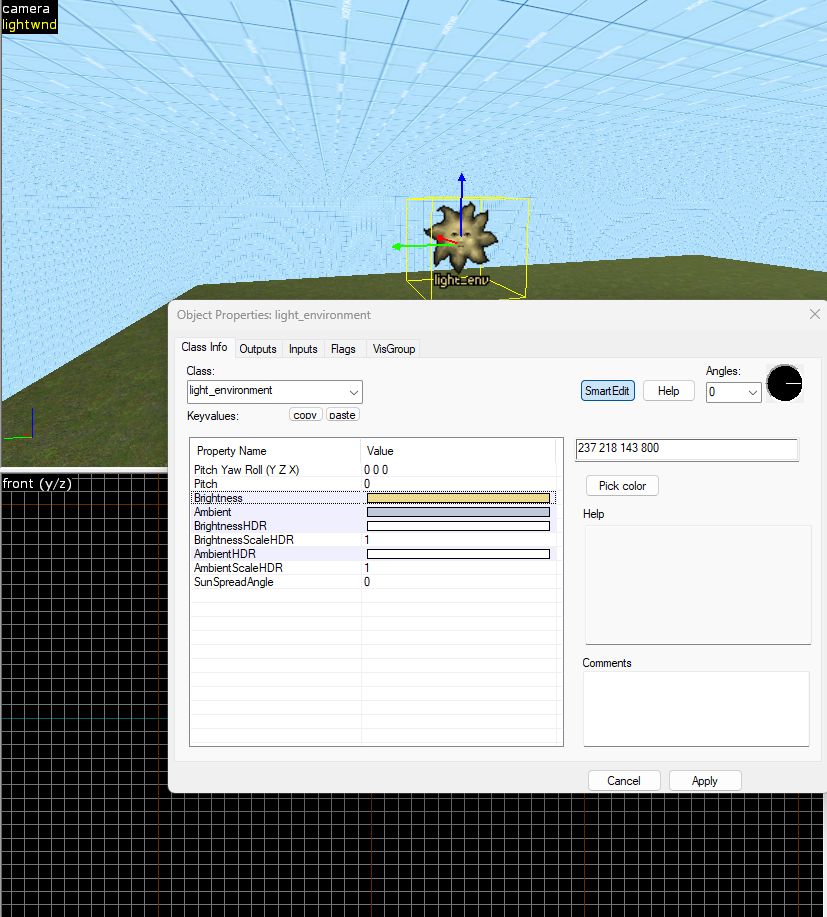
Finally for some lighting, create a new entity, Then double click on the green Gordon Freeman to pull up the entity menu. On the text box under 'Class:' type in light_environment and click apply. The figure should then change into a little sun. Going back to the skybox list on the website, you'll notice recommended color values. Go through your 'light_environment' entity, changing its values to the ones recommended. After your done click apply and close the window. (You might notice some of the values on the site like 'Recommended Sun Angle' aren't on here. That is because they are for another entity known as 'env_sun', but that isn't needed for now.
Congrats, you've done it! You have made your own custom map, the most basic version of one anyways. There are tons and tons of different features I didn't talk about like clipping, optimization, ambient sounds, etc. But if you're interested enough to keep going all of those things have resources on how to use them. Now, if you want to play your map first save and name it.
If you start the name with 'gm_' then your map will be found in the Sandbox section in GMod, if not it will be found in 'Other'.
Press F9 or go to 'Map' then 'Run Map' and click 'Ok'. If you continue your map you'll want to look into the 'Expert' tab of this menu but for now just run it as is.
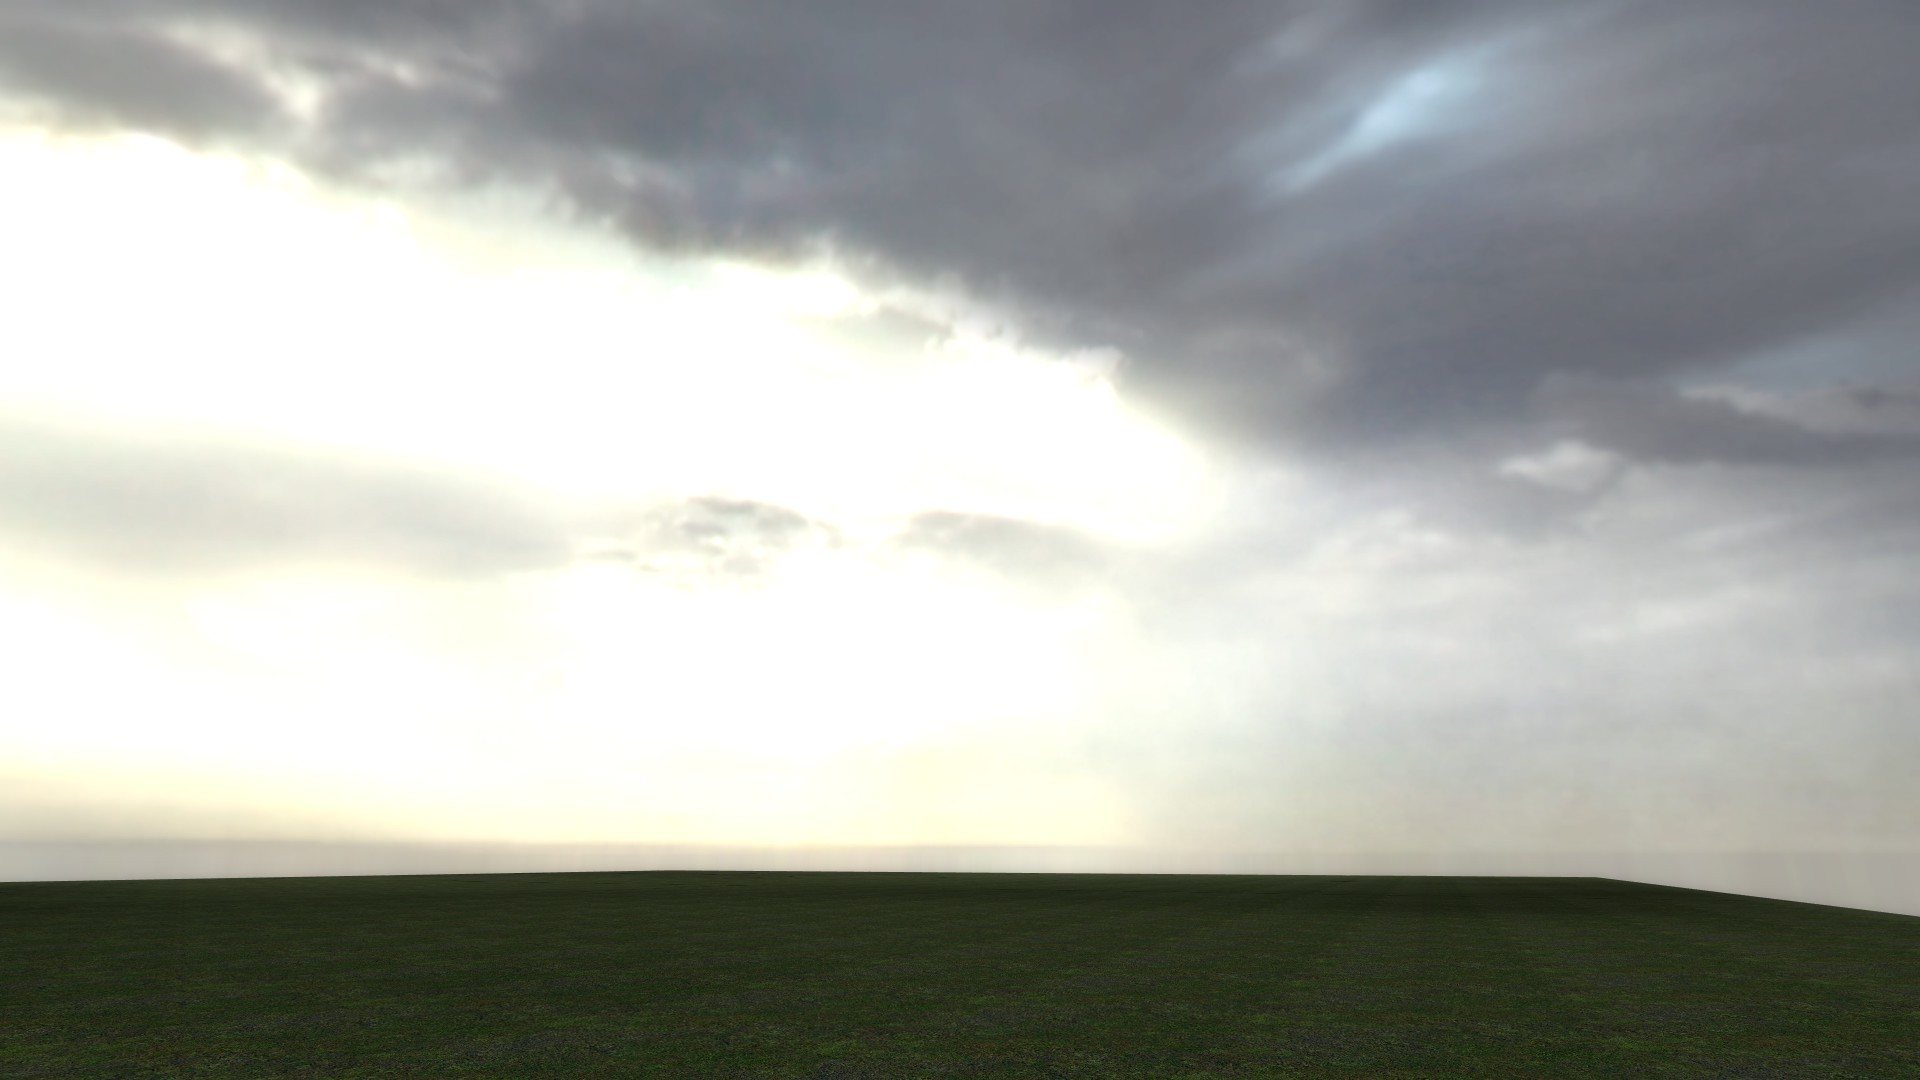
Your own map. Looks pretty basic I know, but just being able to play something you made is cool in its own right!! (Also btw, if running the game through Hammer doesn't work, try just running the map then opening GMod and opening the map there.
So that's it! For more information, I'd recommend 3kliksphilip and TopHattWaffle on youtube as they are both great for tutorials. I personally prefer 3kliksphilip for his short tutorials, other Source related content, and entertaining nature.